Track Distribution Options
Navigate to
- Filter Records
- Show/Hide Columns
- Refresh Data
- Edit Pre-Populated Data
- View/Edit Scheduled Invites
- Send New Invitation
- Export Records
- View Detailed Participant Activity
- Delete Records
Filter Records
Track offers a wide range of insights, but sometimes it makes sense to take a look at one slice at a time. Drill down into your records within Track by applying filters.
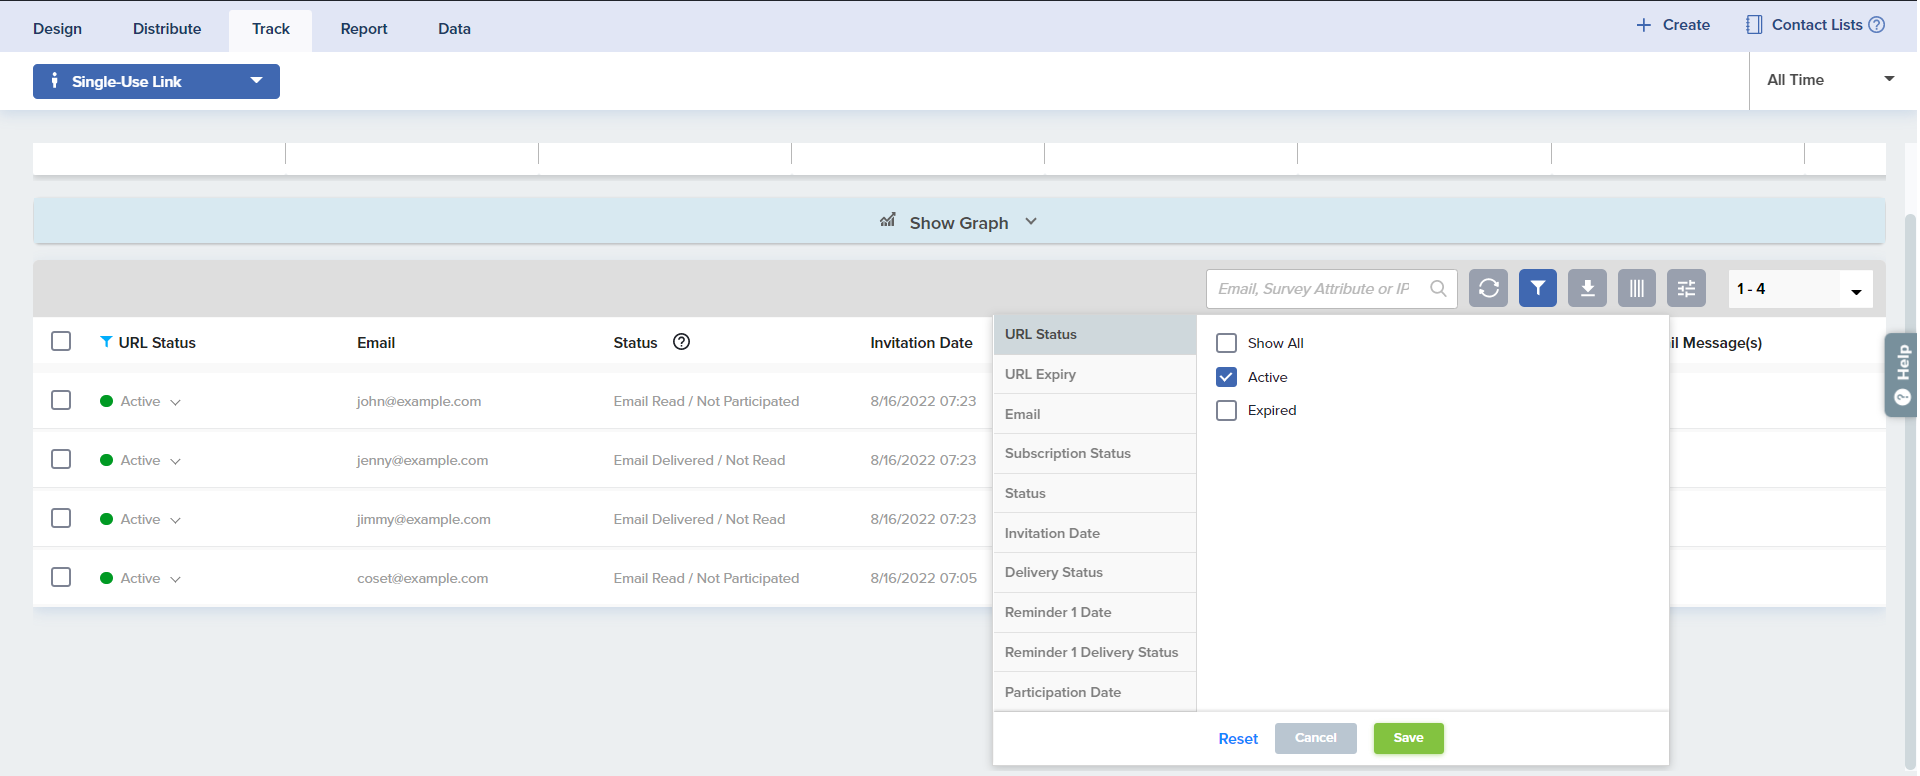
Here’s how:
- Under Track, click on the Filter icon.
- The system will open a pop-up window with options to filter, such as:
- URL Status
- URL Expiry
- Subscription Status
- Survey Attribute
- Status
- Invitation Date
- Delivery Status
- Reminder Date
- Reminder Delivery Status
- Participation Date
- Filter based on your preferred options.
- Click Save to apply your filter.
- You’ll see a filter icon next to columns on which a filter has been applied.
Show/Hide Columns
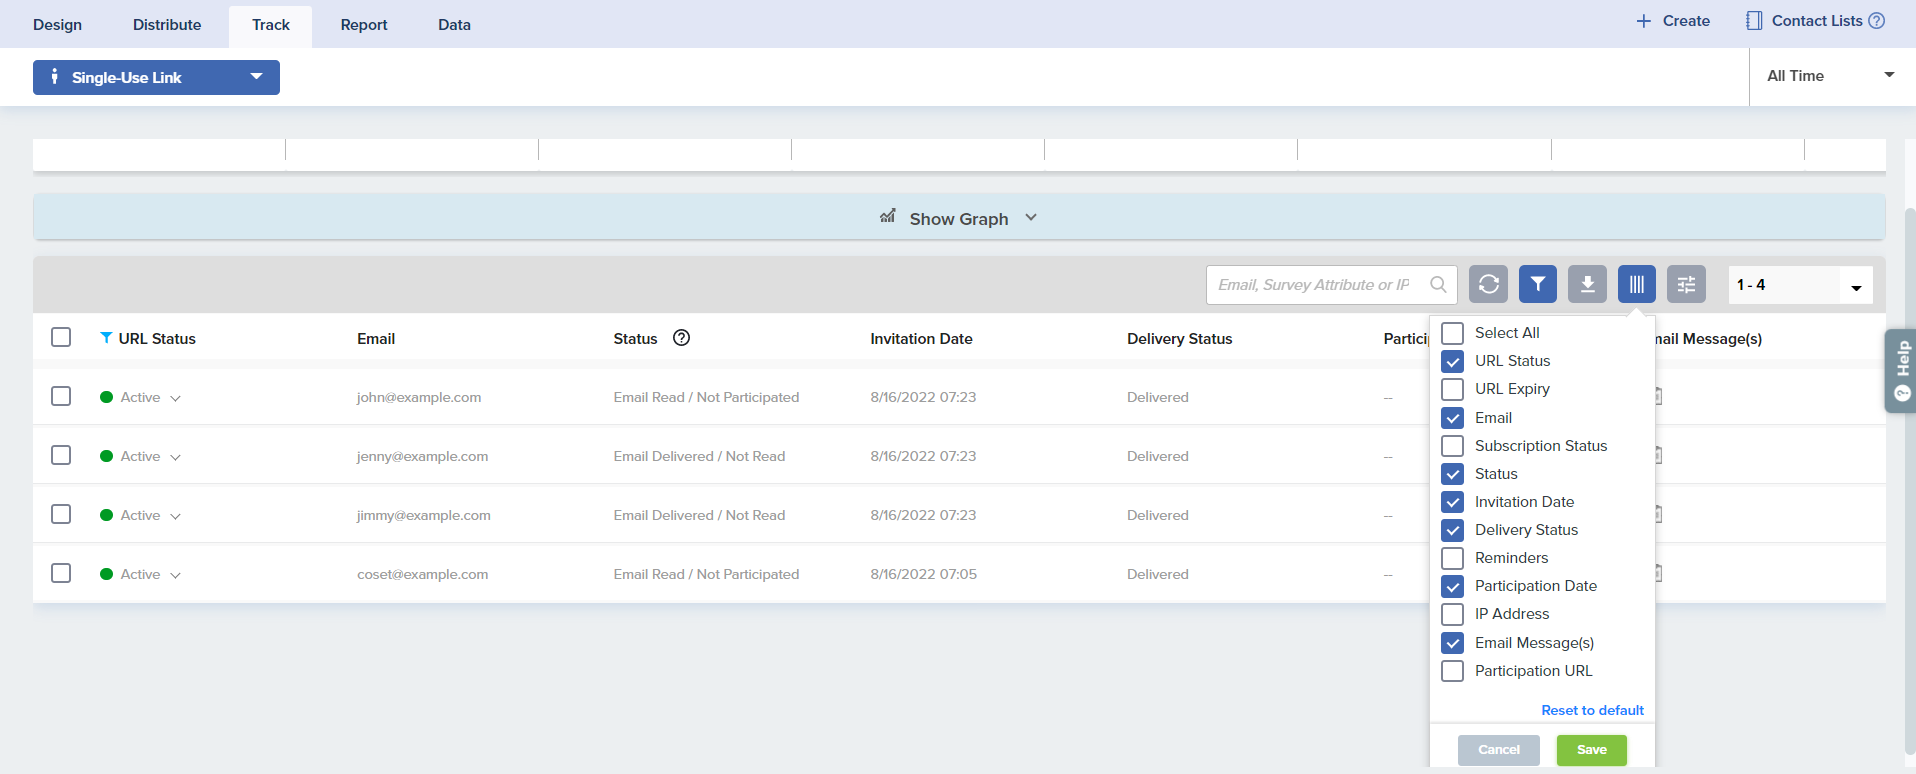
You may choose to show or hide certain data columns in Track. Check the columns you would like to see and uncheck those you want to hide.
Refresh Data
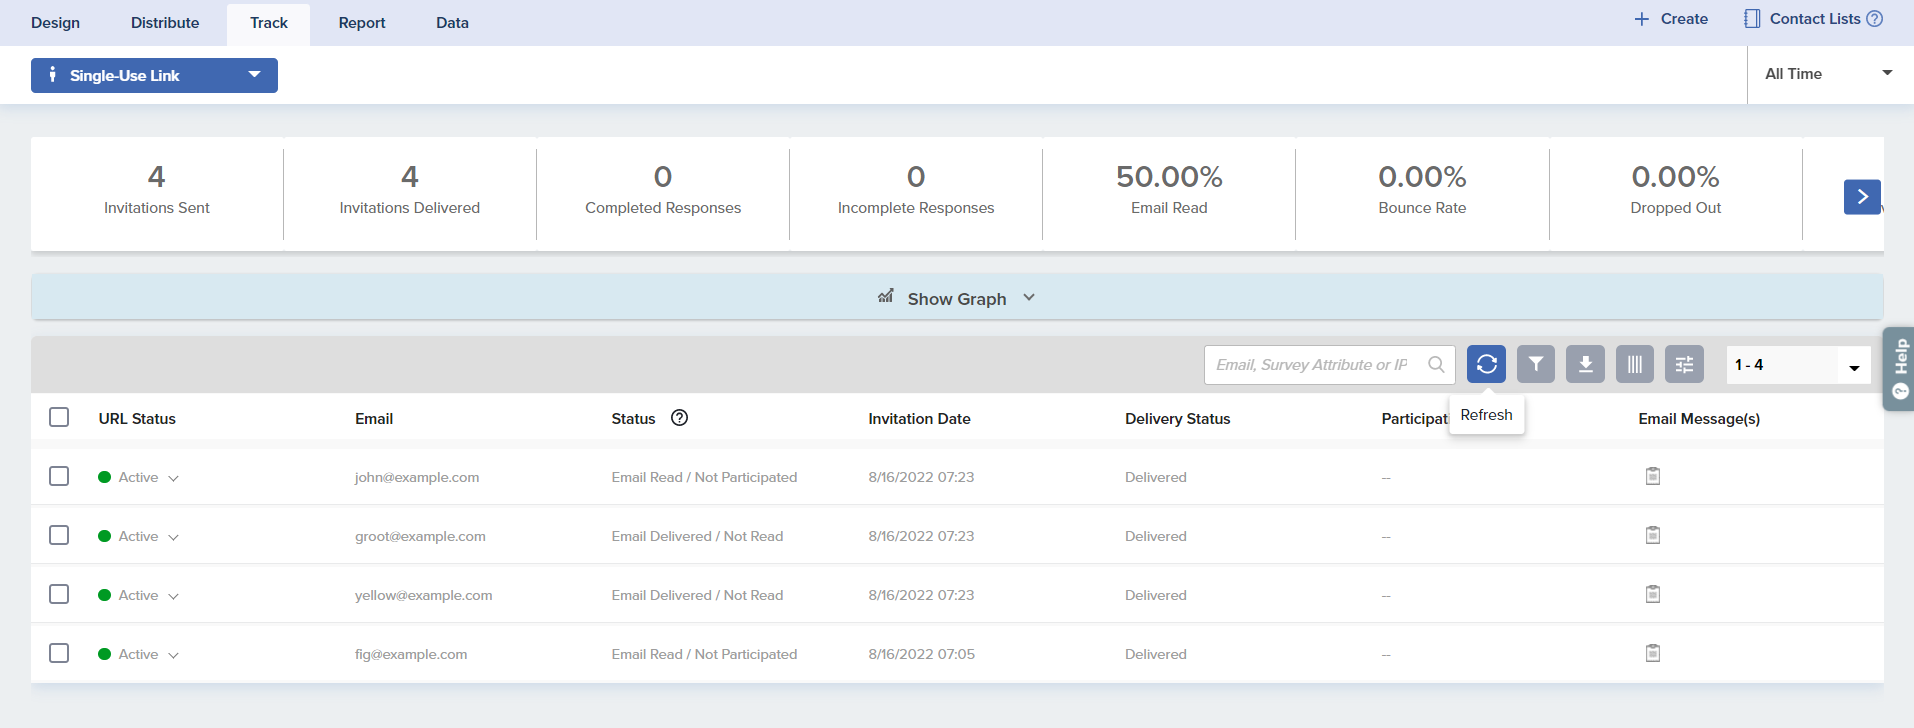
Once you have set your filters and columns in Track, you can refresh your data by clicking on the refresh button. The ability to maintain settings while refreshing Track is only available for Single-Use Link, Multi-Use Link, and Shareable URL.
Edit Pre-Populated Data
This feature gives you the ability to View, Edit, and Export data of email addresses with pre-populated information.
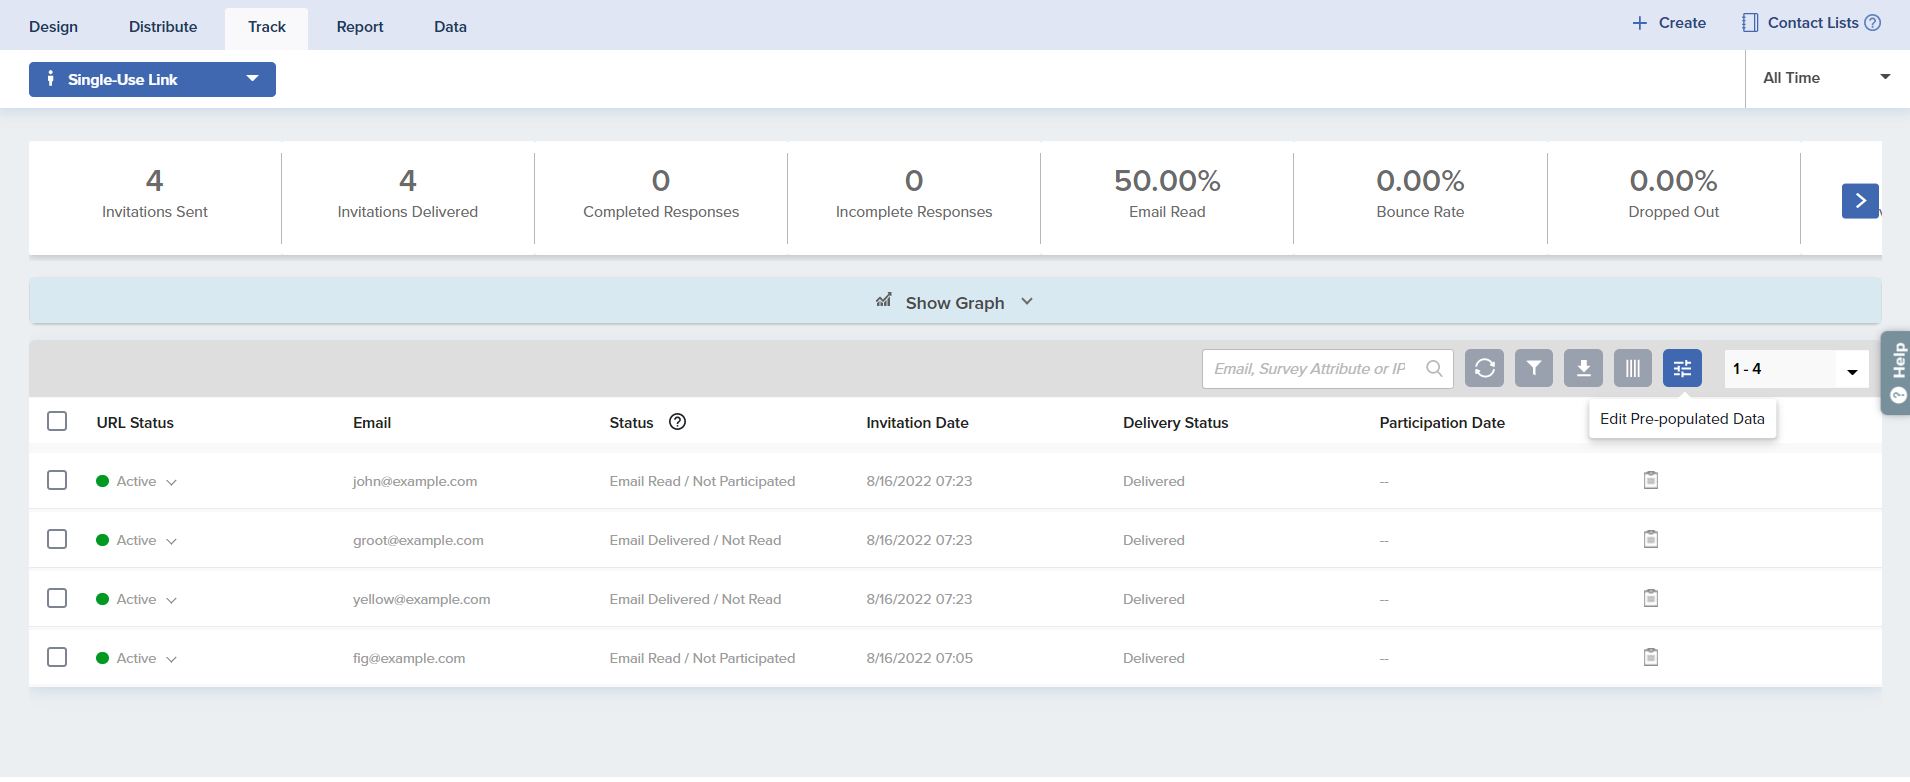
To review or edit Pre-Populated data:
- Under Track, click on the settings icon (Edit Pre-populated data).
- The system will open a pop-up window with Email addresses/Survey Passwords which include pre-populated information.
- You can edit pre-populated fields for each address or password.
- You can also download the pre-populated information in Excel format by simply by clicking on Export.
Maximum 2000 characters are allowed for pre-population.
Review/Edit Scheduled Invitations
As needed, you can delete, reschedule, or cancel scheduled invitations. Here’s how:
- Select the project for which you have scheduled invitations and click on Track.
- Click on View/Edit Scheduled Invites icon.
- In the pop-up, review the invitations scheduled for delivery.
- Next to the appropriate record, click on the calendar icon and choose the correct data and time at which the invitation(s) should be sent.
- Click Done.


Send New Invitation
Send a new email or SMS invitation directly from Track by using the exact details of an invitation you’ve already sent. This option sends a brand new, duplicate invitation, creating a new record in Track. The duplicate invitation will include all the same settings, including the same Email Template, Mail Merge, and Pre-Population options.
If you need to send a Reminder instead, learn more here.
To send a new invitation from Track:
- From All Projects, find your project, then select Publish.
- Navigate to Single-Use Link or SMS records.
- Select a single record by checking the box to the left of the address or mobile number.
- Click the Send New Invitation button that appears above the list.
- A new invitation will be sent with the same settings as the original.

A new invitation cannot be sent through this method if the record selected shows any of these statuses:
- URL Status: Expired
- Subscription status: Opted Out, Permanently Opted out
- Status: Bounced, Email scheduled, Sent for Delivery
- Delivery Status: Bounced, Email scheduled
Export Records
Click on the Export button on the right to download the complete distribution information in Excel format. You can also export filtered records by first applying filters and then exporting.
The downloaded Excel file will contain each participant’s email address/password, status, participation date and time, and survey participation link. If you have pre-populated data in your survey check ‘Include Pre-pop data’ to export it with your Excel file.
View Detailed Participant Activity
What’s your survey been up to? Track survey participation effectively using detailed log tracking option.
To see a participant’s detailed log:
- From All Projects, find your project, then select Track.
- Choose a distribution method from the left panel or a card below.
- Select a single record and click on Detailed Log.
- This feature gives you the ability to track each participant’s activity in detail. The system provides you with the following information with timestamps for each record.

- Survey Invitation Sent
- Survey Participation Opened
- Reminder Email Sent
- Survey Abandoned on a particular page
- Survey Completion
- Invitation Expiry Details
- Invitation Email Bounce
- Reminder Email Bounce
- Survey invitation Resent

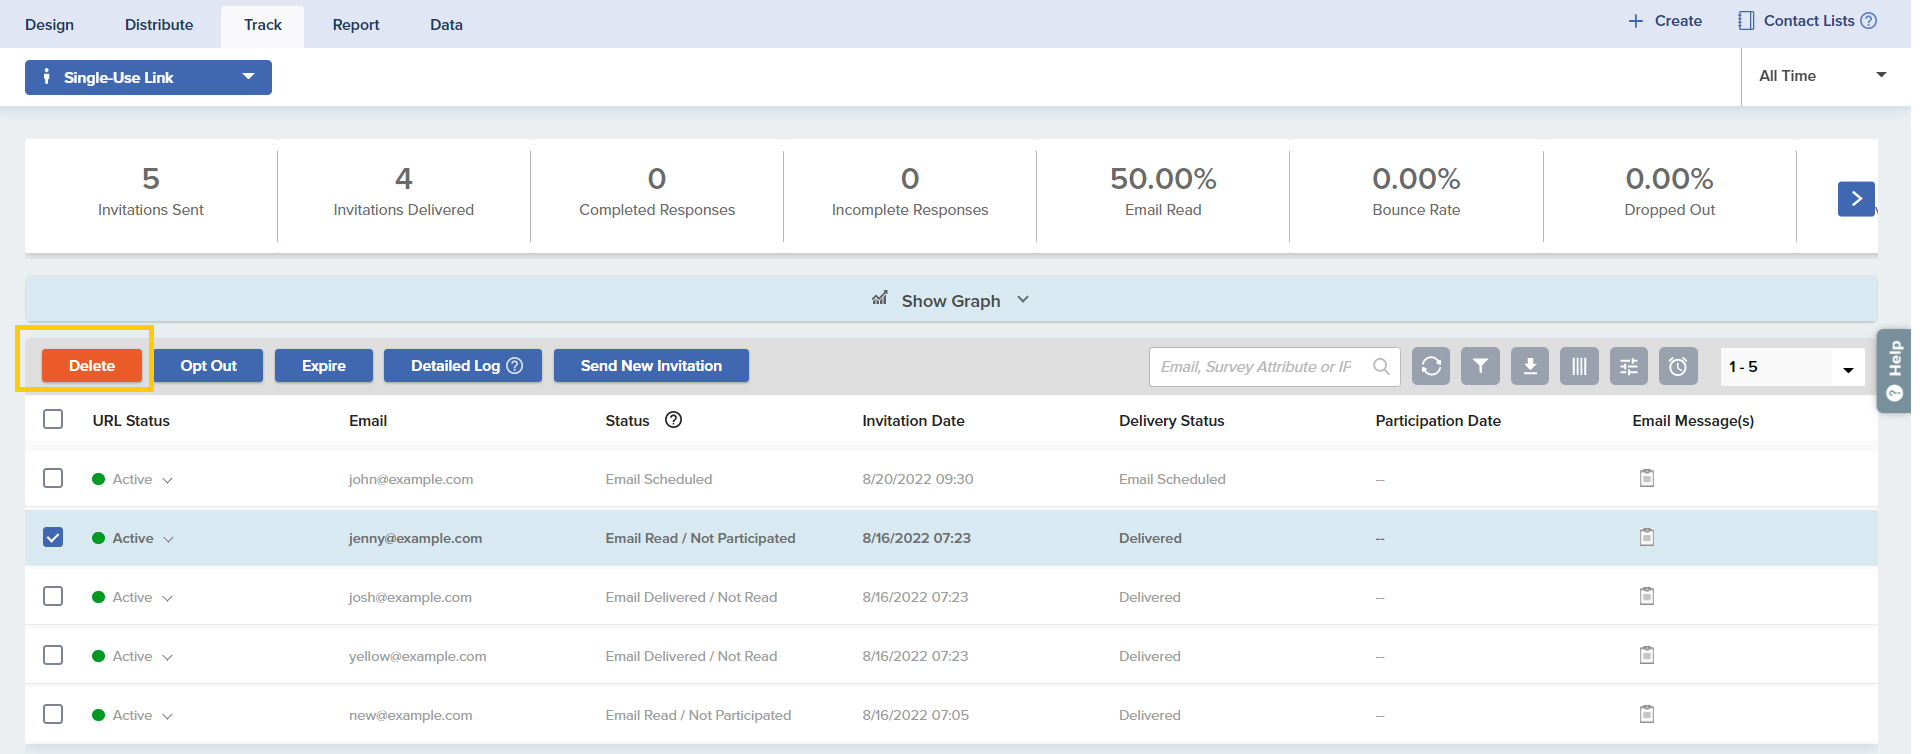
Delete Records
Each record listed in Track is associated with a response. Be very cautious before deleting any record.
To delete a response, select the record by using the checkbox to the left. Click Delete to delete the record, as well as any reminders and responses tied to it.
CAUTION: The delete action is irreversible. Deleting a record here removes the data from the system completely.